Rebel Evo Vegas 5th Element Bar 5th E Bar features
North 2011 Rebel
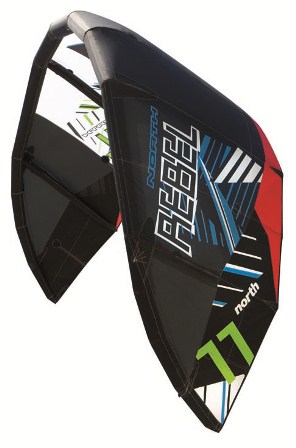
The new 2011 Rebel has had few major changes in appearance but plenty of tweaks, minor changes and improvements to the build and materials. Core to most of these improvements is the use of the all new Teijin Technoforce D2 canopy material with reportedly up to 40% more resistant to tearing and much less stretch.
The Rebel has been associated with power and stability for ages and is a strong and dependable surf kite as well as a proven freeride performer. The 5th Line safety system is the safest and most dependable safety systems available and the new bar feels sweet in your hands. Overall the least obvious but most noticeable chage will be the feel from the new and stronger, less stretchy Technoforce D2 canopy cloth, offering a much more crisp feel of the kite in the air. A great kite just got better!
Quite importantly is the improvements to the new North 5th Element Bar system in the Iron Heart IV and new Trust Bar.
A wave kite of epic reputation, I'll be writing more as soon as I get one in the air .
Sizes: 5m, 6m, 7m, 8m, 9m, 10m, 11m, 12m, 14m, 16m.
Rider Review - 9m 2010 Rebel
I finally took the new Rebel for a spin to put it through it's paces and find out if the hype resembled the facts. Wind conditions were gusty and frontl from 15 to 26 knots, dead onshore in large surf reef break (waves to double overhead).
The first thing you notice about the kite is it's very different to the 09 Rebel in it's build and also flying characteristics. The floating centre strut, new straight wingtip leading edge segments between 2nd and 3rd struts, new connectors for one pump capilliaries, new rear line bungee system and of course the new bar (which I didn't have), new pump and new large bag all are nice changes.
Attention to detail this year, outstanding! The kite pumped perfect and launched easily in the lighter side of the wind and climbed to 12 o'clock. It felt different straight away. The rear line bungees keep tension on the rear lines in the turns and when you combine this with the flutter free designed wing tips, the kite becomes silky smooth, almost ethereal to fly, it's also perfectly silent, eerily so!
It doesn't turn any faster than the 09, it doesn't fly any faster, it doesn't relaunch any easier and it drifts about the same. Bar pressure feels about the same, might have lost a little depower in the top end straight from the bar throw, but this is accounted for by trimming with the trim strap. Although all this sounds similar to last years, it couldn't "feel" more different!
The new kite certainly has a very unique feel to the bar with the kite silently turning and moving without flutter, there is no vibration through the bar from the flutter of either the canopy or the wingtips. It's a weird feeling and grows on you really quickly, kinda stealth like. It's evertthing that last years was plus more, it has a very rigid leading edge with no sign of structural instability and the whole kite is just smoother and far more polished. About the only thing I noted of significant improve was the more linear powe. As power is pulled on, the speed increases smoothly, same with gusts, when they hit, there is only controlled, silky smooth accelleration upwind.
Is it worth the upgrade? Yes, for the bar and safety alone, but the kite itself has entered a new realm of smoothness and refinement indesign. If you own a '09 come and take it for a demo, and tell me what you think, but don't expect it to boost bigger and turn faster etc, but it will impress you no less.
Darren Marshall 12/9/09
North 2009 EVO (Mid Season Release)
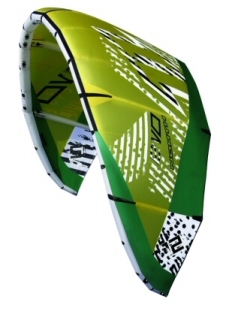
The EVO's shape offers incredible stability to allow you to enjoy freeride simplicity and an amazingly stable feel in the bar which makes unhooking to throw down your latest trick so easy for you to stomp it.
Bombproof construction and solid "C" kite like loops allow you to experiment with whatever kiteloop variation you can imagine. The low down power makes it easy to get up and planing in lighter winds and auto relaunch begins as soon as you let go of the bar. Now you have no excuse to go for it.
The Evo can be flown either with 4 line configuration or 5 line config depending upon the feel you want from the kite.
Sizes : 6m, 7m, 9m, 10m, 12m, 14m
North 2009 - Rider Review
Decided to finally get around to testing the EVO as a school kite option today. Our biggest concern was it's light wind flying characteristics so we decided to put it to the test at Scarborough in 4-8 knots of onshore wind. This is purely a beach test, I had no plans on getting wet on this day.
Getting it out of the bag it looked as schmick as every other North product I've ever unwrapped. The kite is beautifully made and this is evident as soon as you cast your eye over it. The EVO is 5 struts and has no one pump (which suits school use) and the valves seal amazingly well. As with other North kites, it has one inflate valve with no one way stopper and a release valve on the left wingtip leading edge. (You get used to this!).
The EVO has a clever little bridle system on the front lines for if you remove the 5th line and fly it as a 4 line. rear lines have the pigtail clearing bungee to aid in relaunch by keeping the lines away from the tips. Standard sweet North 5th Element bar and simplicity to rig, all colour coded and kook proofed. Once I was rigged it was time to launch. Admittedly this didn't go easily, but then you wouldn't expect a 10m to self launch well in 5-6 knots. With a bit of advanced technique and a bit of cursing it was up and flying. This is where it became really fun!
As soon as I got it up it flew remarkably well. Due to it's bombproof construction I expected it to be a dog in light winds and be very stally. Nope! The Evo climbed nicely to 12 o'clock and just sat there over my head making me nervous. First test power, dive through the wind window and even in 6-7 knots it pulled me forward several metres, sweet! Plenty of power so throw a nice loop and it pulled nicely pivoting around on it's wingtip with no hint of a squashy feeling turn, very direct.
The bar pressure is what I call moderate and steering effort is also moderate which means the kite is only going to do what you tell it to do rather thanit wandering off with lttle attention from the rider. After several minutes of fun flying it came down to brass tacks, how would it handle a luff situation in less than 8 knots? I pulled the bar in to full power and allowed the kite to edge as close to 12 o'clock as possible and as far into the wind as it would go, then suddenly throw the power off by pushing the bar away instantly. The kite simply drifted slowly back to a more stable position further in the wind window. Nice! Now the big test. Same as before only this time sheet out suddenly and run forward (downwind) several metres. The kite pitched forward, then pitched backwards and then forwards as it drifted back into the window again with slack lines for almost 5 seconds. WOW! We repeated this several times with same results time and again.
We found it very difficult to stall as well as luff. I've never flown a better behaved and more stable kite. I liked the lack of flutter taken care of by the trailing edge mini battens and the generous use of Dacron in the trailing edge for flutter resistance. I liked it so far.
Water Test - Finally got to take the North 2009 Evo 7m for a decent run in strong 25 knot squally conditions in a downwinder from Leighton to Mullaloo (snapped a board by Swanny which resulted in a long walk back upwind).
As expected from a 7m, the kite turns very fast and has masses of power when sheeted in as well as developing a bit of apparent wind power. The speed through the window is typical of the average 7m, not too ballistic but fast enough to be fun! As the wave conditions were onshore again I got to test out the drift factor, and again was very impressed, didn't luff or stall it once. The kite is punchy when boosting and should I have wanted to go crazy big, it would have easily done this. Depower is very good, simply sheet out and the juice stops, just like that!
The bar pressure is moderate and slightly heavier than what I am used to but wasn't heavy enough to annoy or bring on the pain in the arms/elbows. Steering takes some effort which suited me fine as that way there are no inadvertant steering mistakes. I didn't put it into the drink to test relaunch so can't comment here, but the kite really surprised me. Not sure what I was expecting, but the kite is excellent for waves and being a little heavier to steer would probably suit freestylers too.
Me thinks they'll make a great school kite.
North 2010 VEGAS
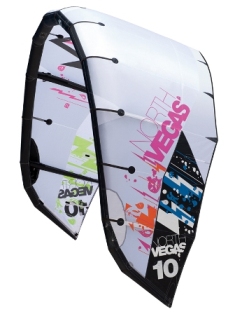
This is the kite I'm waiting for after having ridden last years and being very impressed. The North Vegas is a "full-on C kite" with a heart of pure New School. And before we go too much further it would be wise to mention it still has two rigging options; 1) True "C" Kite with minimal depower, mad stability and desensitized steering. 2) The New School Freestyle mode where it has "C" kite feel but also has the hybrid depower and fast steering.
The blurb from North tells us that they have gone for a combination of feel from 2008 and 2009 so more back to grass roots pure "C" but with added speed for getting the kite back up to 12 to cushion massive mega loops hard landings. The new Vegas has gone from "U" kite back to "C" again! Hmmmm....
The kite has basically been designed to serve the new schoolers pushing new trickery to the limits and is the freestyle choice of all the team riders. The amount of punch from the kite is epic and the can still be setup in a 4 or 5 line configuration with stability and rock solid performance. This is a Hybrid kite but definately has the old kite feel about it, most old "C" kites were pigs of things, but this kite brings the best of new and old together in a really fun package. The 2010 kite also comes with the new 5th Element bar stystem of course making it one of the safest kites on the market in terms of depower and safety release system.
I can't wait for this kite to arrive to do a full rider review Kite arrives on 18/9/09 Stay tuned ......
North 2010 Vegas - Rider Review
This is a review I've been looking forward to. Test conditions were 20-25 knots gusting to 30 knots. Board 132 Jaime 2010.
I really liked the 2009 Vegas for freestyle riding and it was OK as a freerider but I liked others better, but Oh! You really need to ride the 2010 Vegas. For intermediate to advanced riders looking for a combo of freestyle and freeride ...... This kite is truly in a league of it's own!
Let's begin! For a start, the bag is big, need only to fold the kite in half after rolling to fit in the bag easily. Love the bag for packing up in a hurry. The bar is just a piece of engineering artwork. The benchmark in aesthetics, design, functionality and durability. The QR is excellent, the spinning rotor head can be turned smoothly with thumb and forefinger easily whilst under load. The cleat/depower/trim syste is one of a kind and excellent. Enough anyways, lets talk kite!
The Vegas 10m (White and Black) is still multi pump so each strut inflates seperately. Bag because the valve is tight and takes some energy to pump past eh one way valve, good because you could ride a whole session with the plug out and it doesn't leak a bit. The leading edge pumps up quick (no one way valve) but need to squeeze neck to cap.
I set the kite on Freeride settings for fast steering and minimum bar pressure with maximum depower. That worked, bar pressure was low end of medium whilst steering was super responsive and fast and depower was total over a short depower throw range. On launch the kite felt the most stable in the gusty air, perhaps with the short sheeting range it just didn't buck around as much at the bar and so felt more stable and smooth. Turned fast and felt punchy with power so hit the water. It felt quite quick as I rode away from the beach and threw a couple of moderately big jumps (Good for Vegas as they didn't go huge in 09 in my opinion). On one of the jumps I got a little out of shape and spotted the kite way out on te edge of the window. I felt the downwind accelleration and new it was gonna hurt so cranked the bar. To my bewilderment, the kite looped back the other way and made 12 o'clock before I hit the water. I did read about this in the dealers manual, but thought it was the usual BS. NOT! This kite is seriously fast when cranked in the power. I reckon the 10m turns as fast as a quick 7m when you really push it
The Vegas is so unbelievably sweet in turns, through the window, and in any part of the flight window, that you really need to fly it to appreciate it. Such amazing control, smoothest depower, predictabilit, speed, stability boost and on top of all that, it looks bloody stunning in the air. It has lost that upside down U shape from last year and is now just plain sexy.
At this point I'd like to say, that for more advanced riders, this is the most incredible kite I have flown to date ..... ever! I now need to test the kite in freestyle/wake settings to see if it is controllable as an unhooking type kite. If it is, it's a total winner. I write again when I can spend a session unhooking. 24/09/09
North 5th Element Bar System
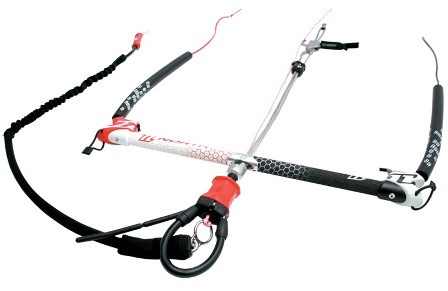
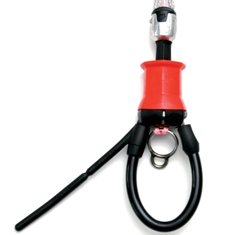
The Iron Heart II is the third incarnation of the North Chickenloop and now sets the market standard for safety and design. The new design is completely ergonomic and can be activated by left or right hand equally as easily. The safety is designed to release a 200kg load with just 7kg force even when caked in sand and wet and just 4 kilos when dry and clean. The entire release process must work within 0.5 sec. This satisfies rigid French Design standards. Easy to reset and no sharp components guarantee a safe release every time.
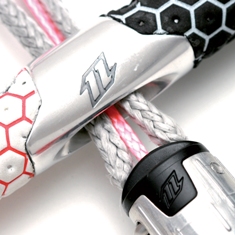
The Auto positioning head re-aligns the chickenloop with the bar every time you unhook so that when you need to hook back in in a hurry after a handle pass or unhooked trick, the loop will be exactly where you need it, facing you. The center of the bar is now a solid metal component with polished internal and external surfaces to reduce center line wear and make it smooth to the touch.
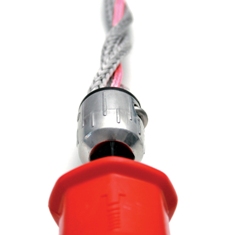
The new Roto Head of the Iron Heart III system allows the safety 5th line to pass through the centre of the chickenloop body and also allows the chicken loop to spin freely with load. This has the feature of allowing riders to spin the bar many times in the one direction and not tangle the safety line around the centre lines. When lines tangle or twist around centre lines on other systems, they may jam and render the safety system inoperative.
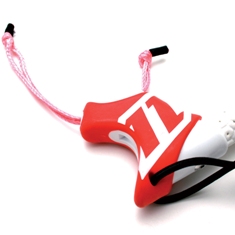
The bar ends of the North "Trust Bar" are able to be adjusted for width making the bar suitable for small and large kites (All-4-one). To change from wide to narrow, the floats are slid out of the way and the leader lines are simply larks head knotted to the opposite end of the short red line running through the bar end. This process takes about 10 seconds per side and can be done at the beach with no tools. The bar winder ends are coated with a soft rubber to prevent injury from contact in crashes and to help keep lines on after they have been wound. A bungee is looped over the lines to prevent them from unwinding.
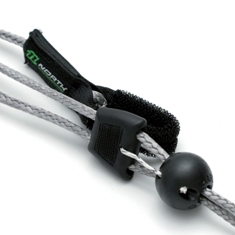
The North Stopper Ball system is a simple sliding stopper for adjusting the maximum amount of depower of the kite so you can rest your arms in light wind conditions whilst taking the load off the bar. The amount of friction can be adjusted by removing the ball and re-installing it the other way up. Of course the stopper restricts the amount of depower the kite has and should only be used by persons who know what they are doing, and only on the water while well away from solid objects. Please speak to us about the stopper system when demoing our kites.
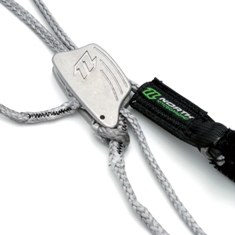
The Vario Cleat System is truly one of a kind in the industry. Not only does the vario cleat allow you to vary the amount of power by the trim system, but the Cleat can be moved up and down the depower line to change the ratio of trim to depower. This is truly unique and a major plus for kiters who want less bar movement but more trim, or for riders who ride waves and need more depower and less trim. The Vario Cleat can be adjusted on the beach with the kite landed and takes only moments to adjust.
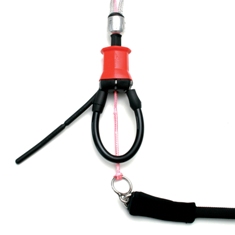
The Standard safety leash setup is simple and effective. The safety leash is clipped onto the stainless steel ring inside the Iron Heart III Chickenloo. When the safety collar is pushed away, the chicken loop releases the bar from the spreader hook and activates the 5th line safety system totally depowering the kite in the event of an emergency. The new design also allows the chickenloop to spin freely below the bar which eliminates tangles below the bar like on many other systemswhen the bar is spun from tricks.
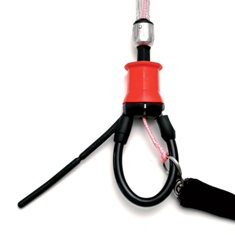
More advanced riders will appreciate the simple "Suicide" setting. Simply set the chicken loop to pass through the 5th line stainless ring and reset the safety release. Swing the donkey dick out of the way and you're ready to start unhooking. When a handle pass is missed and the bar is let go, the safety leash pulls on the chickenloop and avoids the 5th line safety system activation. This saves having to reset the bar everytime you crash. The 5th line safety system still operates but the Iron Heart III safety collar must be activate to release the stainless ring. This can be difficult or even impossible if the bar is beyong your reach.
CAUTION! Using the "Suicide" setup renders the safety depower system inoperative, and should only be used by advanced riders!
]]>AUSTRALIAN KITEBOARDING SCHOOL
TRAINER KITE GUIDELINES AND PRACTICE
Important notes!
If you are reading this, chances are you have purchased a quality Ozone Trainer kite from us (or we hope you have ). This is a basic helper to get you started and we urge you to get proper lessons for power kiting. The exercises in this document are to be used in conjunction with the kite manual you receive with the kite purchased. Initially you should approach flying your kite in light winds as even small kites can generate quite a bit of power. We suggest light winds (up to 15 knots or 25 km/h) and small Trainer kites (up to 2.5sqm), and always consider safe location and the safety of others around you. Again, these are TRAINER KITE PRACTICES and should absolutely NOT be applied to large kites of any description!
When flying your trainer kite, BEFORE you launch, fit the safety leash to your wrist and carry out preflight checks (refer to kite manual). After flying your kite, safely land the kite and THEN remove the kite leash. Kite leashes, kill the power of the kite when you let go of the control bar ensuring yours and bystanders safety. We suggest if you lose control of your kite at any time, you let go of the bar (assuming you are wearing the leash). Safety Leashes should be WORN AT ALL TIMES when operating your kite.
Australian Kiteboarding take NO RESPONSIBILITY for any accident or injuries which may occur as a result of any person reading and then applying this information. YOU FLY YOUR KITE AT YOUR OWN RISK!
This is currently a FREE document and AKS is a small family owned business, PLEASE DO NOT change the content, remove the AKS branding/references, or use if for any commercial purpose. We rely on your support to keep offering stuff for free.
We hope you get practicing safely and enjoy power kiting as a recreation whether it be on water, snow or land. Happy and safe Flying!
Flying a Trainer Kite
A Trainer foil kite will teach you everything you need to understand the wind window and the theory and dynamics of flying a kite in the wind window. Understanding this information is 85% of the total knowledge and skill required to be an independent and safe kiteboarder.
Basic Setup of a Trainer (2 or 3 Lines) Kite.
Most foil trainers will have two or three lines from the bar which connect to the kite bridles. Most lines are colour coded or numbered. The two lines from the ends of the bar connect to the two front bridles on the kite, make sure the bridles of the kite are tangle free before you connect them up. Generally the red line goes on the left side of the kite as you look at the underside of the kite in front of you. The green or blue or whatever other colour goes on the right. If you have a three line kite, there will be a central line coming from the middle of the bar and it should be connected to the trailing edge bridle of the kite. This is the bridle set connected to the back edge of the kite all along the trailing edge. Make sure the lines are not crossed or tangled before you launch. It pays to check your lines twice before you launch, as tangled, twisted or incorrect lines can result in a powerful kite launching with reduced or no control over steering. Like driving a car with no brakes and no steering wheel and the accelerator at full speed!
Trainer kite Launching (Light – medium winds)
For the purpose of this exercise, let’s assume your kite is already setup with lines attached to the bar and kite ready to fly. A foil kite launches from straight downwind in normal light to medium wind strengths, we’ll cover strong wind launch later. Place the kite down on the ground on it’s back with the open end of the kite (Open celled leading edge) facing away from the wind direction (Downwind). Place enough sand to keep the kite in place on the beach without blowing away, along the trailing edge of the kite only. You should be looking at the kite on it’s back showing all the bridle lines facing up with the trailing edge closest to the wind direction. Then unroll the lines from the bar as you slowly walk upwind away from the kite. Once you are in position with the lines stretched out, untwist any twists or tangles in the lines without pulling tension on the lines. Once you can clearly see that the lines are running directly to the bridle of the kite unhindered, make sure the red side of the bar is in your left hand and attach the safety leash to your wrist (if the leash is connected to the right, connect to the right wrist, if from the left, then connect to the left wrist. If the safety leash is connected to the center line, you may attach the safety wrist to either wrist that is most comfortable.
Check to make sure nobody is approaching close to the kite from downwind, upwind behind you, and from the sides. If you are all clear, and when you are ready, pull a little tension on the bar in order to lift the leading edge of the kite up and into the wind stream, this should partially inflate the cells in the kite. When they stop inflating, give a few gentle tugs on the bar to further increase tension and to help the sand lift from the kite and finally, good a good tug on the bar to release the remaining sand and take a step backwards.
Safety Tip! If the kite takes off and you lose control or there is a problem, immediately LET GO OF THE BAR whilst wearing the safety leash and the kite will depower and land straight away awaiting further input from you. You can then sort any problems or rethink your launch.
The kite will lift off the ground with moderate power and quickly climb directly to zenith (above your head) where it will stay so long as you do not change the course of the kite. Keep your hands steady and evenly distanced from your body so as not to turn the kite. The kite is steered by pulling on the side of the bar that corresponds to the direction you want the kite to turn. To stop the turn, straighten the bar again. Push with one hand and pull the bar with the other hand to turn the kite. Do not try and turn the kite by steering it like a steering wheel.
To turn the kite to the left or anti clockwise in the sky, gently pull on the left side of the bar towards your body. You only need a tiny amount of input for the kite to turn. The kite will continue the turn so long as you keep the difference in line tension. To make the kite fly straight again, return the bar to straight so as both lines are equidistant from your body.
To turn to the right or clockwise, pull on your right hand side of the bar. So long as you keep pressure on the right side of the bar, the kite will continue to turn to the right and will execute a full circle in the sky. This can lead to massive unexpected power as the kite loops through it’s turn.
We suggest you make small inputs of control initially until you gain an appreciation of the power in the wind window. Remember, if you loop the kite in then power zone and you cannot control the power – LET GO OF THE BAR – rather than trying to regain control, especially if you have people or obstructions about you. You can repair a kite easily and inexpensively with repair tape.
Strong wind Trainer Foil Launch
To launch the kite in strong wind it is better to avoid the directly downwind launch procedure as outlined in previously inn the light/medium wind launch instruction. Instead, set the kite up more towards the edge of the wind window away from the land ie towards the waters’ edge side of the wind window. The layout of the kite is the same as in 5.2, but the kite will launch so much closer to Neutral that you will not get the massive pull immediately on lift off that you will get from the downwind launch method. The kite should be approximately half way (45 degrees) between Neutral and directly down wind. This will give it some power and stability but still be controllable.
The kite should be set with one wingtip upwind and the other downwind, still on it’s back and of course with the trailing edge closest to you. Walk back slowly and as the wing tip lifts and starts to fill with air , the kite will gradually power up and climb up overhead with much less power than a directly downwind launch.
Basic Flying Exercises
Having good kite flying skills is fundamental in learning to kiteboard. How can you expect to combine riding on a board and producing just the right amount of power in just the right direction, if you cannot control the kite without having to think about it? It is our intention that you learn to fly the kite through feel and intuition and get that skill in your muscles and body (Kinaesthetics). If you constantly have to be thinking about how to control the kite to position it where and when you need to, then you will waste valuable and precious lesson time when you could be up and riding.
1. Basic Steering and Control. Firstly, with the kite at 12 o’clock, gently pull a little on the left side of the bar to start the kite to make a left turn, towards the 9.30 o’clock position or L/H neutral. As the kite turns and begins to slowly descend along the neutral of the wind window you will not have to keep left hand pressure on instead, return your hands to even pressure, allow the kite to slowly fly towards the ground and stop it’s descent with a little right hand pressure on the bar until the kite stops and flies 1m off the ground. Adjust your hand pressure until you can effectively keep the kite steadily in this position. Keep the kite stable in this position for 1 minute and then slowly return the kite to the 12 o’clock position by gently pulling on the right hand side of the bar to initiate a right hand turn upwards away from the ground. Again, once you have initiated the turn, you do not have to keep the turn pressur eon until you wish to counter the previous unput with opposite steering. To stop the kites ascent, counter with a little left hand to turn the kite directly back into the direction of the wind once the kite reaches zenith (12 o’clock).
2. Carry out the same exercise on the opposite side of the wind window, ie, from 12 o’clock down to 2.30 o’clock and then back to 12 again. Continue this exercise for all positions of the clock face and ensure you can keep the kite absolutely still in each position for 30 seconds to 1 minute at each point. If the kite drifts in and out of position, you need more practice.
3. Easy Figure 8’s. The second exercise is to fly the kite in figure 8’s between 11 and 1 o’clock. This will help you build a fluid feel for the kite whilst keeping it in constant motion. Begin as usual from 12 o’clock and by pulling on the left side of the bar, turn the kite towards 11 o’clock. When the kite reaches 11 o’clock, make a turn with right hand pressure, straight away without stopping, and bring the kite back across the window, past 12 o’clock until the kite reaches 1 o’clock. Again as soon as it reaches 1 o’clock, immediately turn the kite back across the top of the wind window towards the 11 o’clock position againand so on…… You should aim to become fluid in your steering and control of the kite and this will produce a small amount of power if done correctly. As you gain confidence you can turn the kite more aggressively back and forth until you feel comfortable.
4. Powered Figure 8’s. This exercise is to allow you to feel some of the power of the wind window. It is similar to the previous exercise but instead of 11-1 o’clock, start at 10 o’clock and fly straight across to 2 o’clock in as straight a line as possible. To do this you will need to make a sharp turn and aim the kite at the opposite clock number, then execute another sharp turn to get the kite to race back across the wind window to the original starting point. The kite will produce considerable power as it accelerates across the wind window. Pay particular attention to how much power is created and where in the window the kite is as the power comes on.
5. Power strokes. An important exercise is to create consistent power strokes in the direction of intended travel. To create a power stroke in the direction of across the wind to the left, you need to start the kite in a power dive from 1 o’clock diving sharply towards 9.30. Before the kite reaches 9.30, you need to make another sharp turn back towards 1 o’clock again. Again, before the kite reaches 1 o’clock, you need to execute another tight turn and bring the kite back down the same diagonal line towards 9.30 again and so on… The aim is to try and create uniform traction favouring the left hand side of the wind window which will be the choice of direction to travel. This is a very exacting exercise and must be completed flawlessly to create power only in the direction of travel. If you go too far to the right, the pull will be too far downwind, if you turn to early, the power stroke will be too short, if you wait too long the kite will reach neutral and the speed and power of the kite will be too “on and off” to be of any use.
6. Sining. Same as 5, but this time to the right hand side. Starting from 11 o’clock, dive towards 2.30 and back and so on. Repeat until you can control it precisely with ease. No mistakes! This exercise not only teaches good power strokes, but also is the embodiment of “Sining”. Sining is a technique in which we can generate more wind speed across the canopy of the kite than the prevailing wind speed. This is a fundamental skill required when you ride in less than enough power for your kite and will be a skill you will always use in kitesurfing on lighter wind days.
7. Advanced Exercises – Down turning the kite. Most of the time when you are learning, you will turn the kite upwards towards the zenith which will slow the kite and reduce power as the kite moves closer to the neutral away from the power area. Sometimes however, you need to create power in the turn to keep speed and power high for fast carving turns on the board. In order to do this, you need to turn the kite in a downward loop away from the Zenth. Begin with the kite at 1 o’clock and make a turn towards 11 o’clock by pulling with the right hand. CAUTION: Downturning the kite will create substantial power as the kite tracks down into the heart of the power zone, so be ready! You will also notice straight away that the kite, during it’s loop, will twist the lines. Do not be concerned with the crossed lines. The left side of the kite still corresponds to the left side of the bar, so just ignore the twist in the lines. Once you have successfully made a down turn across to 11 o’clock, you can keep going and execute another down turn away from Zenith in the opposite direction from 11 o‘clock down and across back to 1 o’clock again. By doing this you will remove the twist in the lines and return everything back to normal. Again, expect some serious pull from the kite. Remember if you lose control, LET GO OF THE BAR.
8. Crash Recovery. It is almost certain that you will crash the kite into the ground at some stage. If flying a 2 line kite, you will need to put the bar down, remove the safety leash and go to the kite, resetting it in the original launch position, then start over again. If you are flying a 3 line trainer such as the Ozone Imp’s. Simply pull on the trailing edge or 3rd line progressively until the kite lifts off the ground backwards. Once it starts to lift, turn the bar either way and the kite will flip over into the launch position. Grab the bar with two hands again making sure you have the left end of the bar in the left hand and get ready for the pull of a launch.
9. Expert Exercises for fun and skills sharpening. Try flying perfect squares in the wind window. Tight right angle turns and fly straight lines to form the square. This is not easy! If the beach is clear, try flying across the wind window with the kite at a constant height from the ground starting at 3m off the ground and eventually working your way down to less than 1 m. Please watch out for other beach users when flying advanced manoeuvres’. The kite will move fast and creat tremendous power in these manoeuvres and should not be attempted until you have the skills.
10. Synchronized Flying and chasings. Grab a friend with a similar kite and stand side by side and chase each other copying the manoeuvres’ of the leader. Take turns in being the leader, this will sharpen your skills and reaction time. Enjoy the trainers, they are great fun.
11. Final Exercises. Once you have mastered the exercises above, the next step is to learn to do most of them without looking at the kite directly (Foveal vision). Your aim is to be able to fly the kite using only your peripheral vision (watching out of the corner of your eye). This will take a combination of three things; sighting the kite in your periphery, feeling the kite’s pull with your arms and upper body (muscle memory and physical feedback, and also having the knowledge through experience of where the kite should go and what it is about to do (Cognitive). Ultimate level, is to be able to fly the kite with your eyes closed, opening them every now and again if you need to ascertain the kites position. Only do this on the basic exercises! This takes time, don’t rush it, enjoy the learning process. The more time you spend flying your trainer kite, the more flying the kite becomes intuitive, second nature and an extension of your body. You will not have to think to produce the kind of power you need in the direction you want, you will have experienced all manner of feelings and situations from the trainer so that when you fly the big power kites, you will not be learning harsh lessons of “what if?.....”
CAUTION ! Remember that full sized kites cannot be flown like a trainer kite. Many of the power exercises can only be done on land which is the reason for the trainer kite in the first place. Trying some of the power exercises on a full sized power kite will throw you like a rag doll no matter how strong or heavy you are and you will be hurt! If you feel you need to practice this kind of power moves on a full sized kite after you have had lessons, make sure you are in the water so you can deal with the full power and speed of a full sized traction kite.
Once you have completed this series of Exercises with the trainer kite, you will be more than ready to start lessons with the full sized kites with our school. All of the exercises correspond to techniques used when flying the big kites. So when you are ready, book your lesson with us and take the next step. If you can fly the kite like you should be able to after 12-15 hours on the trainer, then we will get you riding in just two short lessons on the big gear.
Don’t stop flying the trainer though, there is never enough time to gain more experience by flying the trainer, or get your partner or best friend into the sport by giving them a go on the trainer too.
See you in School! J
]]>

AKS sells quality Ozone trainer kites from the IMP Trainer range. These kites are "foil" design and are only suitable for use on land, they cannot be used in the water as they will collapse and take water in the event of a crash in the water. The foil design is inexpensive, powerful, compact and easy to setup making it ideal to keep a trainer kite in your car for when you may have a few spare minutes to kill.
The IMP Trainer is in it's 3rd series with the latest model being a complete redesign from the ground up. The new IMP's have the new colour pattern distinctive of the Ozone range of kites and have a cleaner safety system and new bar. The flying characteristics are closer resembling the performance and handling of their bigger land and water counterparts in that they fly more slowly, turn in a greater arc and have a solid pull similar to the larger kites, this gives a much better "feel" when learning to fly. The new design is very stable in the air in all wind conditions making it even easier to fly and fun for all levels of experience.
The IMP Trainers are 3 line configuration with the two front lines controlling the turning and power of the kite whilst the third line hangs limp and loose in normal flight conditions. It is only when in emergency, relaunch or landing situations that the third line comes into play. By releasing the bar, the third line is tensioned and the front two lines are slacked which folds the canopy and allows it to drop harmlessly to the ground without power.
Should the kite be crashed onto the ground leading edge down, the kite can be easily re-righted by pulling on a front line for turning the control bar, and also tensioning the third (back) line to initiate a reverse turning relaunch. This saves a lot of frustration over a standard two line trainer kite which need to be reset into the launch position to begin flying again. The IMP Trainer just turns over and relaunches from the bar without having to go to the kite or have an assistant.
Buying a Trainer kite and spending as much time as possible flying it prior to a lesson will give you an advantage if you have no previous flying experience, it is not essential but experience tells us they do help a fair bit, then once you have moved on to lessons, the kite is always there for your friends and family to prractice on at a later date when they become interested in your new sport.
Although learning the basics of flying with a trainer kite is really easy and can take as little as 5 minutes, it is the repetition of flying and having it ingrained into your unconscience that makes the difference, for this we recommend about 12-15 hours of flying until the control and handling of the kite becomes 2nd nature. If you are going to make a control error when flying kites, its better if it happens on a small trainer kite than on a full sized power kite.
Training Exercises for Trainer Kites only!
For specific exercises to practice when you have your trainer kite, click this link
]]>About Kite Styles Riding Styles/Suggestions Kite Selector Guide
Surf Kites Freestyle/ride Kites New School Kites
Big Air/Race Kites Glossary of Terms
I'm so confused, How do I know which kite will suit me?
This is a tough area for anyone who hasn't had at least two years experience in the sport. There tends to be a lot of Jargon thrown around, a lot of acronyms, a lot of buzz words and quite frankly, a lot of BS. For a start, every manufacturer will pretty much say the exact same thing, it's like they get one guy to write the blurb for every kite type and they all just change the name where it says <insert manufacturer name here>. If you believe what you read on their pages, every kite is the saviour of the kiting world and has become faster, lighter, stronger, easier, prettier, more depower, more power, faster turning and the list goes on ...... boring!
My aim is to align you to the kite which will best suit your riding level allowing you room for growth, making sure it does everything you want and at a budget you can afford. For this you will need to ring me and answer a bunch of questions I'll fire at you, and with this info, I'll make suggestions in the price range you are looking for. I do not necessarily push any particular brand over another, but rather try and give you what you need, not necessarily what you want, but what you need. There is often a difference between wants and needs ..... and hopefully you'll see my logic and appreciate the honest feedback . At the end of the day, the choice is your's and hopefully, this will help you make a more informed decision.
As a beginner or someone who is new to the sport, unfortunately, I'm going to ask you to trust me to do the right thing by you because there is so much hype and anti hype, brand pimps who won't declare their allegiances to shops or brands, and lots of misinformation from the chronically misinformed (Yep, its a mine field out there!)
However, as with all of our products, we welcome you to try and demo the gear you are keen on (provided you have the skills to use it) and see for yourself. Many of our customers have tried every board or every kite in determining what is right for them, and more power to them for they make wise choices and go away completely satisfied they got exactly what they needed!
| RACE | BIG AIR | FREESTYLE | FREERIDE | WAVES | |
| Airush Lithium | * * | * * | * * | * * * * * | * * * * |
| Airush Varial | * * * | * * * | * * * | * * * * * | * * * * |
| Airush Vapor III | * * * * | * * * | * * * * * | * * * * | * * |
| Airush Generator | * * * | * * * | * * * * | * * * * | * * * |
| Core GTS | * * * * | * * * * * | * * * * | * * * * * | * * * * |
| Core GT | * * * | * * * * * | * * * * | * * * * * | * * * * |
| Core Riot XR | * * * * | * * * * | * * * * | * * * * * | * * * * |
| North EVO | * * * | * * * | * * * * | * * * * | * * * * |
| North Rebel | * * * * * | * * * * | * * * | * * * * * | * * * * * |
| North Vegas | * * * | * * * | * * * * * | * * * | * |
| Ozone Light XC | * * * | * * * | * * * | * * * * * | * * * * |
| Ozone Sport + | * * * * * | * * * * | * * * * * | * * * * | * * |
| Ozone Edge RX | * * * * * | * * * * * | * * | * * * * | * * |
The above table is a guide only and will depend on the style you wish to ride. For instance, if you ride waves on a twin tip, I would rate the Airush Generator higher than it currently is for wave. Use this as a guide and then read up on the kite itself by following the links of each Kite name.
If still confused, please just call me as I love to tailor kites to individual needs 0433 982 696

About Kite Styles
Delta Kites - The new kid on the block. The Delta kites are only a couple of years into their lifespan and have breathed some much needed life into the industry. A Delta Kite is a plan shape with very parabolic leading edge curve and heavily swept back wings. They are usually bridled kites often with pulleys to enable faster steering and better depower. Delta's happen to be very powerful for their sizes and turn and fly fairly fast. They all have auto-relaunch to a point where the kite will do most of the work for you (yes, you still have to do some small part in getting it out of the water). Delta's are usually known to be a bit heavy on the bar pressure but have solid stability and are good all round kites.


The SLE kite was the follow on and improvement over the standard "Bow" or wide span kite. With a slightly lower aspect ratio and less width and more "C" shape, the SLE's turned better and had less flight issues than the pure Bows. The SLE's tend to be characterised by having a pulley on the leading edge which connects the front line bridle to the back line bridle. This allows massive range in "pitch control" or in plain terms allows the kite to change angle of attack more aggressively to give more pivotal turning, and higher degree of depower. These kites tend to be powerful and easy to relaunch, but have little "Feel" for the kite in the air. The rider usually becomes accustomed to the kites feel. These kites were the set in evolution between the Bow and Delta.
Riding Styles and Suggestions
Many of these kites fit into more than one category but in order to try and keep it a bit more simple, I have placed them into the category they are most suited to. Beginners don't have a category as I tend to not sell beginners beginner kites like the Airush DNA or North Buzz, (unless you really need one), but rather I try and set you up with a kite that you will quickly grow into and slowly grow out of.
Use this list and the table below it as a rough guide to help narrow your search, then click over to the models and info on the kites, check the pricing and sales blurb if you like and then give me a call to help steer you into the right final decision, hopefully I will just confirm what you have already decided. Information is power!
Surf Kites
These are kites which invariably have a broad range of power to full depower, they are usually fast turning and "Drift" extremely well when lines go slack when on the wave face. They should also relaunch really quickly and well, and be resistant to luffing and stalling.
Freeride/Freestyle kites
Although Freestyle and Freeride are quite different in most peoples vocabulary, they have a lot of cross over. Freeride is a combination of all styles and to ride with no agenda. Freestyle is to perform new school tricks usually whilst being unhooked from the kite. Many kites will do both reasonably well.
Hardcore New School Kites
Big Air/Race Kites
These kites tend to be the most efficient kites producing massive lift, and can handle terrific speed through the air. Race and Jump kites tend to have very rigid canopies well supported by multiple struts (5+) and are usually (but not always) the most difficult to relaunch
Glossary
Leading Edge - Front inflated tube which forms the front part of the curved canopy
Trailing Edge - trailing part of the back of the kite, usually unsupported
Struts - Inflated sections running front to back which lock the wings profile.
Profile - The aerodynamic cross section of the wing which creates lift.
Bladders - The inner plastic vessels that hold the air inside the struts
One pump - The system by which all struts and leading edge can be inflated from a single point on the leading edge
Multi Point Pump - All struts and leading edge are individually inflated and sealed off.
Canopy - The skin of the kite
Wing Tips - The left and right side ends of the kite. Usually steering lines attach here.
Chicken Loop - Control loop that attaches to the harness to control power.
Trim strap - Adjusts power of the kite in a macro sense
Suicide leash - A leash attached to the kite and your harness which doesn't depower the kite if you let go.
Chicken finger/Donkey Dick - A small 6 inch pin which can lock the chicken loop to the harness.
Bridle - A series of web like thin lines which support the wide span of a kite and allow huge depower.
Auto Relaunch - Is a term used todescribe a kite that prepares itself for relaunch from a crash by making it's way to the edge of the wind window by simply letting go of the bar and waiting. Mostly from Delta kites!
Wing chord - Wing chord is theoretical centre line of wing when viewed in profile. From LE to TE.
Angle of Attack - A of A is the amount of angle between wing chord and relative wind. Low angle = Less power, High angle is more power to a point (see stall). Angle must be positive ie above horizontal.
Stall - A stall is when laminar airflow breaks away from the wing surface and destroys lift. Kite usually flys backwards and falls out of the sky. Mostly caused by rider error of pulling in too much back line tension when kite is low.
Luff - Is the opposite to Stall where the kite drops from the sky leading edge first also refered to as "Hindenberging", often from lack of back line tension in gusty wind.
Pivotal Turning - Is the ability of the kite to 'pivot" on itself and turn without much forwrd motion. Usually low power in turns and commonly associated with many but not all bridled kites with pulleys.
Radius turning - is the kites inner wingtip creating a wider radius in a turn. both wingtips move in a forward motion and the turn radius is usually larger than a pivotal turn. More power in turns.
Stability - The ability of a kite to remain flying with little input from the rider in gusty conditions.
Static power - Is what AKS refer to as a kites ability to produce power/lift simply by pulling in on the bar to full power whilst the kite remains motionless in the sky.
Apparent power - The kites ability to create power through its speed through the air. Little static power, but bags of apparent wind power when flown quickly or ridden fast.
]]>The Airush Lithium is a brand new release from Airush in 2010. The Lithium starts where the DNA leaves off. The Lithium is a 4 strut Delta Hybrid aimed squarely at the beginner market. The Lithium is super stable, and sits back in the wind window for predictable handling at all times.
The Delta shape leads to "auto-relaunch"making re-launching a crashed kite childs play. The depower is almostb total withe Airush's new V3 bridle system which allows the bridle to lay the kit flat and pull from the centre of the kite when depowered. 5th line safety with only 4 lines.
The Lithium employs Airush's "Frame technology" which is just a Dacron frame around the panel edges to prevent major tears from leach to luff and and provide canopy rigidity. The kite is strengthened in all the right areas and has Airush's new FBI (Fast Bladder inflatio). God I hate cheesy acronyms!
The Lithium is also available in the LW or Light wind variant in the two larger sizes of 13m and 15m. The LW have optimized flattened geometry in the nose section of the canopy to improve upwind ability and increase speed.
At the end of the day this kite will appeal to the beginner market or people wanting a simple kite that just works for general freeriding.
All kites come with the new Airush SMART bar and BRAIN Quick Release system as explained below.
Sizes: 4m, 6m, 8m, 10m, 12m, 13m (LW) & 15m (LW)
Airush Lithium 2010 - Rider Review
OK, so the Lithium is a new kite for 2010, modelled on the DNA, it is squarely aimed at the entry level freeride/learner market. The Lithium is a 4 strut Delta Hybrid kite. It is designed to sit a bit further back in the wind window and be grunty and stable, it's also pretty quick on the turns. Test flown in 20-25 knots gusting a bit more.
Firstly, the bag. It's the smallest bag I've ever seen. My daughters school bag is bigger, now this is great when bringing it home from the shop and hanging on your wall (or in a truck ), but it's an absolute bastard to get back in the bag and forget it if you're in a hurry, you'll just have to stuff it in your boot and deal with it later. I finally know what the compression strap is for. Having said that, the bag is nice, well made and lux, it has a nice compartment on the side for the bar and a rig I haven't quite worked out on the other side for the pump (I made it work though not right).
The one pump system uses big bore but thin walled transfer tubes of which one kinked on me whilst pumping up due to long tube length and weird angle. Sorted easy enough and it pinged nicely at 8psi. The big Diameter tubes are great when deflating and rolling the air out, very quick!. The valves work well (sea easily) but are restrictive when inflating so a little more effort required when inflating the leading edge when compared to some other kites. The Lithium uses two sets of pulleys similar to Core kites so depower is total when safety system is activated (same as Core) which is great and the kite falls onto it's leading edge on the water into the wind. Makes self landing easy!
Once rigged, we tossed it up and no adjustments were necessary, it flew well straight from the bag. The Lithium does sit a little further back in the wind window but you tend not to notice it when flying it at 12 on the beach. The new Smart bar has a long depower throw which is a bummer, but they have tossed the old below the bar trim system, YAY with a capital YAY! The trim strap is well out of reach so a pair of extensions lead down to a more reasonable level where it is easy to use the Pull/Pull trim setup. The stopper ball is good but because you need the full length of depower to fully turn the power from 0-100%, then it's a little pointless in gusty wind, probably better in smooth steady wind.
The Lithium pulls hard when dived to get going and you take off with a good squirt of speed. It turns quite quickly but has a squashy bar feel similar to F-One Bandit Dos. Many people liked Dos so it shouldn't be a drama to most. The jumps are fairly easy, just send it, but you need a little speed and when you do send it, it will take you up, but it sits back in the window and will land you a bit fast downwind if you are over zealous on the trigger arm and fire it from 11 instead of 11.30. The kite gives good jumps considering it is aimed at the lower end of experience and gives decent hangtime when you get it dialled.
The upwind on the kite is fairly impressive considering where it sits in the wind window and I had no effort to get well back upwind, it wasn't a battle like on the older DNA's. What I really liked was it's power coming out of a downturn carved transition. Huge power when needed, just sheet in and go.
It's a good solid kite and will do nicely for the target market it is aimed at. Perfect for beginner to intermediate freeriders.
24/09/09
Airush 2010 Varial
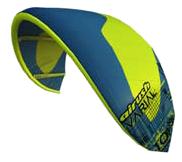
The Varial has a sleeker profile for greater speed and control in a wider variety of wind strengths. The sleeker profile also offers better upwind ability than that of the Lithium as it sits higher in the wind window. Being less pivotal in steering and more forward movement steering it will have more power in the turns and should have smoother power delivery in flight.
Relaunch is easy and will roll over and launch hot which is a good thing for surf riders looking to get the kite back in the air quickly. The Varial has good boost and controlled hangtime whilst being light on the bar for steering and nimble in the sky.
The new Varial also comes with the new Airush Bar system and allows customizable feel on the bar and adjustable bar throw.
Sizes: 6m, 7m, 8m, 9m, 10m, 12m, 14m
Airush 2010 Varial - Rider Review
This is a kite I was really looking forward to and got the chance to put it through the wringer today in 20-25 knots of wind SSW gusty in choppy water.
The Varial is a 5 strut Delta Hybrid and is the hyped up version of the Lithium in respect to performance range. Similar in build and design to the Lithium (read above for more details). Bag is too small, but looks great and if you read my Core XR review, this bag you could take into town. Helluva sexy bag, just too small to fit the kite in once it's been used without careful packing down.
The Varial felt quite similar to fly to the Lithium but was a bit faster and less pivotal as the brief says above. It boosts nice jumps, and delivers good hangtime. Definately pulls less downwind than the Lithium in jumps so landings aren't so hot, due primarily to wider turning circle. The steering is direct and turns the kite quickly, but with a similar slightly squashy feel to the Lithium. This is something you'd probably get used to as I know one accomplished rider who has been riding one for ages and he loves it.
2nd Ride
Yesterday I got the chance to ride the Varial again. Wind was a very unsteady 15-18 knot. The Varial needs to be pumped up HARD. On my previous ride I only pumped the kite to the minimum suggested pressure (8psi) and had an issue with the kite. This time I pumped it to 10 psi as suggested by Airush designers and had no such issues again. The kite flew beautifully and made most of my trick repertoir seem easy. There still isnt a lot of downwind pull from the kiteloops but in most other senses the kite was very predictable and easy to ride. Boosted good jumps and had a good feel to it.
Upwind ability and relaunch was easy and the kite looked good in the air. Several others took the kite for a ride and also came in with similar positive comments . It's not a cutting edge kite for people looking for the nth degree of performance, but it IS a good solid all rounder which will cover most peoples riding requirements well.
I think the Varial would be a fine kite for the average learner to advanced intermediate to get out there and have some fun.
Airush 2009 Vapor III (Mid Season release)
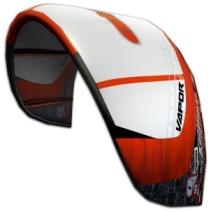
The depower is of hybrid whilst the flight and feel from the bar is pure"C". Relaunch is also hybrid in nature making it easier to rollover and launch more downwind.
Super stable and fast, the Vapor is for people looking to improve their freeriding and freestyle riding whilst not getting too far out onto the edges of "C" kite behaviour.
Sizes: 5m, 7m, 8.5m, 10m, 12m, 14m, 16m
Airush SMART Bar and Brain Chicken Loop
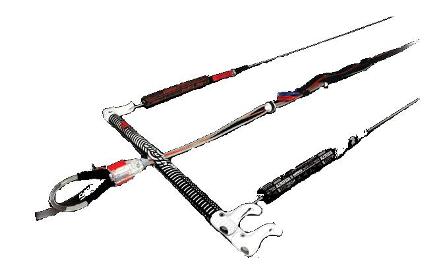
The Airush SMART Bar is a very clever design and although I don't like the name, the features it packs put it up there with the best. Firstly, the bar is extendable. Simply press the pin, remove the extendable bar end slide the special spacer onto the tube, then re-insert the tube back into the main part of the bar until the lock "clicks". Nice, now one bar makes traveling easier with two kites to save weight.
The new Brain quick release chicken loop lays claim to greater simplicity and allows spinning of the chicken loop benneath the bar so multiple rotations can be un-spun whilst riding.
The SMART bar fits all the 2010 kites and can be 4 line or 5 line, 45cm or 55cm long, and has multiple adjustability for all lines so tuning is easy. Airush have gone with the more simple and reliable strap trim system which is a BIG improvement over the below the bar cleat system of previous bars.
Some other nice features are you can still opt for below the bar cleat, multiple different line length configurations and improved safety leash. All in all, Airush have vastly improved the bar system for 2010. Now how about we work on a new name eh boys?
SMART Bar and Brain CL - Rider Review
Today was my first look and ride of the new bar system from Airush. It is filled with little innovations that are unique and clever and work reasonably well.
The bar length adjustment is good, it is easy to shorten or lengthen, and takes only seconds each side which is good. The bar feels solid in either short or wide mode. The bar diameter is good and grip is comfy. The centre rivet is good and feels solid. There are no line bungees on the end of the bar winders like on other bars to keep the lines on when wound which keeps the bar looking very clean. Instead the bungees are cleverly installed in the bottom of the floats on each sid. Not so clever is they can be quite difficult to get at when the lines are wound on the barespecially if you wind your lines on the bar quite tight. I'd suggest winding the lines on loosely. Once the bungees are in place, they work better than any other bar line bungees that I have seen on any system.
The Trim Strap is efficient but out of reach so extenders are added to gain access to the trim, this works well and looks neat and tidy and is a far cry from the previouly unworkable below the bar trim cleat system. The depower throw is long, quite long, but not out of reach (I have long arms). If you are short it may be a little issue so that you have to use the stopper ball. Twin depower lines and a safety line run through the bar for below the bar safety. This is clean and works well.
The Brain Chicken loop quick release looks a bit plasticky but seems to work OK. I didn't test the release today under load and note that it can be activated by either hand equally well. It is impossible to rest with one hand, this is definately a two hand job to reset it in the water and even then, it can be a bit tricky.
The spinning/rotating head on the bar we tested today was extremely stiff to turn and although it will turn with a bit of force, it certainly wont do it on it's own.
The donkey dick is long and chunky and gives you a nice feeling of confidence that it isn't going to fall out in a hurry. I didn't use the new leash system but did inspect it, it looks good and is simple and foolproof. Good quality snap gate clip on the end. Other great feature is the two piece line sets which allow you to change line lengths by removing the extensions.
Overall it is a nice innovative bar and only needs a few minor improvements to be a really great bar. The extendable bar ends are a real winner. Nice one!
24/09/09
]]>

OZONE 2011 C4
 The new C4 is here and we have been lucky enough to grab a couple of demo/preproduction photoshoot models to toy around with. There is a lot of excitement about Ozone's newest version of the ground breaking C4 design as rumour has it, one of the best "C" style kites has gotten even better. In speaking with the designer, they didn't want to just tweak the older model and so they started from the ground up and rebuilt the C4 as a new kite.
To look at the 2010 and the 2011 kites in the sky, you'd say there isn't a lot of change going on, and thats good! If it aint broke, don't fix it. What you feel when you fly and what you see when you look up close are two very different kites though.
Firstly the most obvious change even at a distance is the hot looking pattern of the panel layout and also the wicked new colours. This year, C4 comes in Lime green, Sky Blue and Fire engine red and the colours are seperated by more angular panel cuts and also wingtips are screen printed up and look the goods. The wingtips are a bit more squared off and beefy on the 2011 and they are still 5 strut. What is noticeable is how much more rock solid the new models look when flying, even in gusty wind.
The inflation point is now a large bore screw in fitting similar to Cabrinha valve but bigger. The kite is so easy to inflate and takes half a second to deflate when you pull the valve out. Also of note is the new ability to change the front bridle setting to a more depowered less sensitive freestyle mode for those that want to go really old school.
I rode it in freeride mode and the power is up a little on last years whilst speed is also up a little, turning is just a bit quicker but the kite is quite a bit smoother. In the bar department the new Contact Bar has been adopted by the C4 as well as the Catalyst. It really is the little things like the 2 inch longer depower range, the omission of the back line adjusters in preference to the clean look of the "under the float" system which is simple and effective and keeps the bar clean as. The bar will never wear a centre line depower rope and the new trim cleat is awesome and so easy to use.
The new C4 feels very similar to the older version, quick, lively and pulls nicely though the turns which makes it fun to fly and the most perfect kite for those riders wanting full "C" kite feel but whilst still hanging on to the easy relaunch of a hybrid and also the light bar pressure and direct responsiveness. A truly great kite and well worth the wait.
OZONE 2011 CATALYST
 The Catalyst 2011 is back again after a very successful 2010 in it's first incarnation. The "Cat" hasn't changed remarkably in looks or performance. It looks a bit neater, and perfroms a bit better. The reason being is that the 2010 was soooo good, there was not an aweful lot really needed changing. The obvious changes noticed by riders of the Cat, was the two additional inches of depower throw on the depower line, that and the fact that it is now PU covered to prevent wear. The 2 extra inches is all that was needed to give the kite the almost full depower it was lacking as a school kite.
The Cat comes with two steering attach options denoted by Heavier Bar and Lighter bar. I've flown in both modes and it flies well in both guises. On waves, lighter bar is ideal. The new inflation "boston" valve makes inflation about half the effort inflating and half the time in deflating. Care needs to be taken to ensure no sand gets on the seals to create leaks. The new COntact Bar has a new cleat trim setup which is just great and easy. The bar trimmers are gone and the bar is completely clean of additional bits. New grip and EVA covering makes for a nice bar. A new slider type device allows the trim to operate with less friction to make precise power adjustment easier.
The boost of the 2011 Catalyst is certainly improved over the 2010 with a little extra height and also hangtime. The other noticeable difference is the lack of flutter in the canopy being resident to most three and even four strut kites. The smoothness through the air is obvious when you fly them and their speed is maybe a tad quicker.
As a rider, the comment I get most from people who demo the kite is "It's just so easy and fun". The kite is responsive and predictable with no bad habits at all, this makes it ideal as a wave kite for wave freaks, and also makes it easy for beginner and intermediates to get decent jumps without fear of crashing and launch issues.
I took the Cats away with me on my holiday over winter and loved riding them for both freestyle and waves. The new Cats were amazing at this years early October Exmouth demo week in massive waves and difficult conditions, I just focused on the wave and some ten seconds later a hundred metres further down the line, I remembered I had a kite on the end of the lines. This speaks volumes to me as it just became part of me, as was my left foot. It was doing important stuff but without me having to focus on it or even notice it was there.
A sensational kite!
Ozone 2011 Zephyr 17m Light Wind
{youtube}Aqpr6WAdUG0{/youtube}
Previous years kites
OZONE 2010 C4
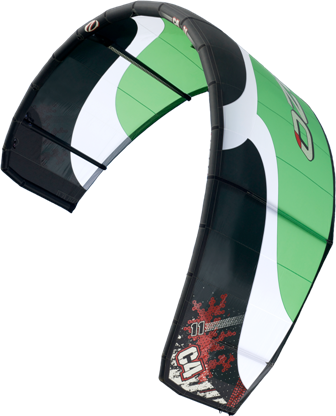
The other question is; "What don't you like in "C" kites?" This is also usually pretty straight forward. They don't relaunch well without a 5th line and they don't have depower which makes them the almost exclusiveweapon of hard core experienced riders.
What if you could somehow combine all the good things about a "C" kite and remove the negetives? Ozone have done exactly that and have produced a kite which has excellent true "C" kite feel with the speed we all loved but have added proper depower and easy relaunch on a simple 4 line kite. This has been achieved by using a short pulley less mini bridle to allow the kite to change tow point when sheeted in and out.
The new Ozone C4 is set to take the kiting world by storm by offering a true "C" kite but making it safe and easy enough to use for the average rider. The C4 had very good depower and can be relaunched by simply turning the bar. This coupled with a new bar design and the same Ozone graphic, will ensure a wicked kite which should set the manufacturing world scrambling to catch up.
Keep an eye out on the waters near you as these kites start showing up. AKS will of course have demo models available to try.
Rider Review - Ozone 2010 C4 12m
After logging 5 days on the C4 it's time for a fair review, as with all our reviews, it will be honest and won't pull punches.
The bag and accessories are usual Ozone quality, basically best in the business. The same inner bag, and awesome repair kit is in place as per all Ozone kites. The new bar is awesome, I mean really awesome! It feels so nice in your hands, the perfect diameter and shape, the textured, moulded grip is perfect and the depower line which is covered by a polyeurathane cover to prevent wear doesn't jam in the hole. Colours are good, bright blue and bright red, means no mistakes and the megatron chickenloop is great. Below the bar safety is ok and will wear out with repeated unhooking, luckily Ozone provide spares in the repair kit! Bar is neat and tidy with same cleat trim as previous models which works perfectly.
The Kite itself looks just awesome, graphics are simple and very tidy and the attention to detail is totally Ozone. One pump is good, no problems and the canopy cloth is new Teijin Techno Force. The kite has a mini bridle for the front lines and three positions for the steering lines to change bar pressure/steering response. Shape is definately "C" when it's inflated and would be considered moderate aspect ratio. 4 Line config is simple and tidy with front line flagging system.
How it feels in the air? The kite has obvious "C" qualities to it in that it doesn't have full depower like an SLE/Hybrid, but it goes close. Steering is quite direct and feels good, not as crisp as a true "C" kite but still quite responsive. Bar pressure is light on light and medium settings, I haven't tried heaviest setting yet but would assume it to be about medium pressure. The kite turns pretty fast for a 12m and doesn't pivot turn at all, it turns in a radius as a "C" kite should and pulls nice power in the turns.
The C4 has moderate speed through the wind window and goes upwind with the usual Ozone efficiency (well). Relaunch is easy and is best effected from straight downwind where the procedure is to push out the bar and pull about 1m of either steering line leaders. This turns the kite over and hot launches the C4 from deep in the wind window. Just sheet out to prevent the obvious stall, and it's above your head in seconds, dead easy!
The first thing you feel is how smooth the kite is, the smoothness in turns, in the wind window and through the gusts, very nice feel to the kite and absolutely no bad habits at all. In fact the kite is so well behaved it borders on flying perfection. Boosting the kite is simple and easy, no tricks required, just send it and keep the bar in. This isn't the biggest boosting kite I've ever flown but it is perfectly respectable and on par with most other kites. The hangtime is a bit under average as it doesn't have the canopy to provide the lift like a wide span has. Due to it's shape, it also doesn't have the bottom end grunt or power of a Hybrid/SLE and no where near the power of a Delta. If you normally ride a 10m SLE, you'd need a 12m C4 for the same power.
The kite is very predictable, totally reliable, and so easy to manage that there is no need to get used to this kite, it just does everything so perfectly that there is very little challenge in mastering it which allows you to fully focus on your riding and the tricks you want to nail. My own thoughts are the kite will impress and be perfect for learners all the way through to advanced or people wanting to fly a real no brainer "C" with good performance and no bad habits, but if you are an expert rider looking for an edgy, twitchy and aggresive kite with raw performance that is ready to take a bite out of your ass if you screw up, then you need to keep looking coz you won't find it in the C4. It's totally easy, smooth, dependable, quick, reliable and high quality and will suit most riders who want to experience a good "C" kite that will allow you to improve and further your freeriding and freestyling reportoir. A demo is a must!
Updated : 30/11/09 8.28am
Take me to the Shop!Ozone Catalyst 2010
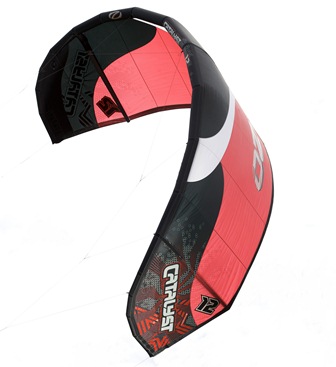
The quality of construction is as good or maybe even better than the previous kites with the noticeable addition of the Teijin Technoforce label assuring the owner that they have a kite mad of the absolute finest materials available. What this means is a kite that will last long after most others have sagged, stretched and lost that "crisp" performance. Along with all Ozone kites, the leading edge and struts are made of Polyant Dimension Dacron, again, the best in the industry. All Ozone kites are manufactured in their own factory, unlike most other brands, this allows them a level of control over quality others can only aspire to.
The three strut design has been kept and improved to give less canopy flutter in turns and when depowered. It also makes the kites lighter and more responsive which improves their surf use significantly. The simplicity also reduces cost which is obvious at the checkout.
The Catalyst has a lot more punch and boost than it's predecessor and in the right hands will produce huge jumps and above average jumps even for the layperson. The Catalyst has great appeal even to high end riders looking for stability and speed for waves and is equally at home in the hands of beginners as demonstrated in our own school.
Ozone 2010 Zephyr 17m
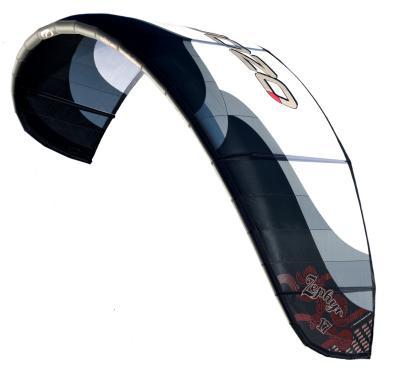
If you want to be the 1st on the water with a kite that can kite-loop with a tight turn radius within the top half of the wind window and want to be in with a chance in any course race below 10 knots then look no further.
The 17m Zephyr turns like a 13m, Robbie has worked his magic and the Zephyr is a technical masterpiece.
We have worked hard to ensure the Zephyr not only gets you riding in the lightest of winds but is also “light” on the wallet. Priced the same as most brands 13’s, you can now have a kite to keep you smiling.
The Zephyr has a huge wind range and is therefore an excellent heavy riders large size kite to own.
Our Course Racing Team continue to dominate with the Zephyr and they report having a clear performance advantage. The new Zephyr rides on the current 2009 bar so no bar upgrade is required. You can purchase this kite as canopy only for $1699
I hope to have more info for you all in the near future.
{youtube}-0EtWJuT2R4{/youtube}
RIDER REVIEW - 17m OZONE ZEPHYR
Today was a pretty ordinary day for wind which turned out great to test the new 17m Ozone Zephyr. I bought the kite without bar and lines and just grabbed a set out of one of our other Ozone kites. The kite is big, in fact huge when it's laid out on the beach. It didn't take that long to pump up despite it's size.
Wind was around 10-12knots gusting to 13 or so. I grabbed the North Race LTD board and despite feeling very little wind, dived the kite and stepped on the board. Power came from no where and I accellerated up to planing speed immediately. I rode off upwind and speed and was improved by cranking on the back foot and pointing up wind.
Now I have heard claims of riding in 8 knots. Whilst that may be the case for some lighter riders, I think that you can forget about it on anything other than a specialist light wind twin tip or Course race boards if you weigh over 85 kilos. I have ridden the Zephyr down as low as 8 knots and have stayed upwind and had great fun but only on course board. In this case the wind was wavering around 7-10 knots and yes, the kite did keep pulling me easily through the 7 knot lulls but to start in a steady 7 knots, might be a bit of a stretch although very doable if you are already planing.
I've also heard the claim that this kite turns like a 14m. Well, when powered this is absolutely true but in the light stuff, it's a little slow, but then again in the ultra light winds we are talking about, most kites barely even fly! The Zephyr does turn quite decently and it is no slouch for a 17m but this isn't a kite you'll be doing kiteloop jumps with. Having also said that, most light wind kites aren't the sort that you have to work, you just dive, park and ride in most cases. The kite can easily be looped whilst on the water and it will comfortably make the turn. I think the kite should be flown on a bigger bar and it would probably turn more like a 13m or maybe even a 12m on a 60-65cm bar. TheZephyr ships with a 54cm bar which is tiny for the size of the kite it is flying.
The specialist light wind kite Zephyr goes upwind well in light wind as promised, but to get the most from it, it needs to be paired up with a specialist light wind board. Something like the Airush Exile boards or North Race LTD is ideal.
The Zephyr will definately get me out on the water and having a blast whilst eveyone else is standing on the beach wondering if they should even inflate their kites. This is a serious light wind kite of exceptional ability and quality. Teamed up with a Race board, it is a dull day killer. Some of my best days have been blasting along at 15 knots in only 8 knots of wind with almost no chop and no one else on the beaches and definately no one on the water. I absolutely love this kite!
Is it worth it? Definately! Especially if you are a current Ozone owner as you can do as I did and buy canopy only for only $1699, or complete for $2199, so for less than that cost of a 13m Sport, you can have the 17m Zephyr. Good light wind fun!
Updated 30/11/09
Ozone 2009 Instinct Light XC
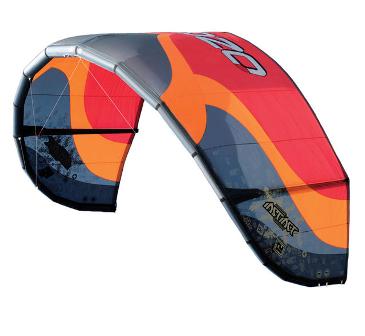
The Light XC is a simple kite made from the best materials in Ozones own factory under their strict control. This allows high standards to be maintained and attention to detail to be a priority in the build of every kite produced. All Ozone kites are made from expensive and high quality Teijin cloth.
The Light XC is a 3 strut, surf and freeride kite for beginners to advanced riders looking for performance with dependable simplicity. The new 2009 kites are all 4 line setup for simplicity and utilize a short bridle system to enable high depower. Depower is about 85%. The Light XC is fast and quite nimble as it is made light so it takes less effort to change directions or accelerate and decellerate. Being only 3 struts, it is two struts lighter than most other kites.
The Light XC is designed to be a great wave kite with fast turning and excellent drift ability. Re-launch is also simple and intuitive, just pull on one back line and up she goes! The power of these kites and agility will also send you up high in big sent jumps and kiteloops are great fun as the kite has a nice "C" kite feel to it.
The bar is again simple and uncluttered with the ability to spin the bar (although only in suicide safety mode). The Megatron chickenloop has been upgraded and improved making it even safer and easier to operate. The safety flagging line is below the bar. The trim system is one of the easiest and most effective on the market with the cleat never slipping.
Bar pressure is light to moderate and has great feedback so you always know where the kite is in the sky. Priced quite reasonably the Light XC can be the kite to suit all riding occassions.
Ozone 2009 Instinct Sport +

The Sport+ is a 5 strut kite for a super stable canopy and constant power. The Sport + is a powerful kite and aerodynamically speaking develops monster power from apparent wind speed so often you can ride a kite size smaller than whet you think you need. Power is controlled by the same bar system as the Light XC ie 4 line setup with a mini bridle on the kite to fascilitate depower. The depower is not as total as the Light XC and the kite is certainly very "C" like in feel. Depowers about 70%
The Sport boosts big jumps and has massive hangtime due to the efficiency of the profile and arc of the canopy. By waiting late in the jump and looping the kite as the kite is right overhead, the kite will hold you up for an amazing hangtime.
Steering is de-sensitized in the Sport + because the last thing you want is a kite which moves to unwanted bar input, however if the bar is cranked fully to one side, the kite still turns fast, especially sizes below 11m. I wouldn't recommend hard core kiteloops on the larger sizes as they will not complete the loop before you hit the water due to larger turning diameter.
Ideally the Sports make great cruising kites for people who want beautifully smooth flying highest quality kites, or for the more hard core wake and new school riders needing solid stability and dependable power.
Ozone 2009 Instinct Edge RX
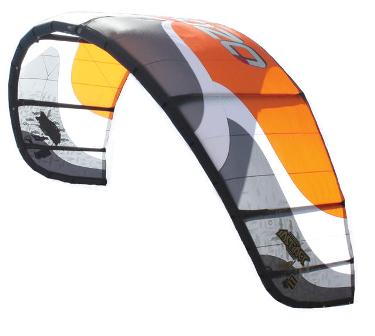
The Edge RX is the highest aspect ratio, most aerodynamically efficient kite in the range and the power and smooth feel immediately make you feel at home. The long thin canopy is well supported by 7 struts which create a rock solid profile under all conditions which make the kite feel the same in all wind strengths.
Due to it's superior profile and drag reduced design, the Edge is more depowerable than the other kites by simply creating resistance with the board ie, hard edging. This sends the kite even further upwind and depowers the kite. The upwind ability in all of the Instincts is legendary but even more so on the Edge RX where a dedicated run can put you so far upwind of everyone else you'll sruggle to believe it.
For sheer power and speed the Edge RX is in a class of it's own and as a racer or big air weapon you will struggle to find better whilst still being easy to manage. Relaunch is again simple although requires just a fraction more technique than the two other kites in the range as the Edge RX can and will relaunch in the middle of the wind window if you so choose.
The Edge RX is a 4 line also with short mini bridle. The feel again is "C" like with very smooth and balanced ascent rates in jumps and smooth long flight times bfore returning you to the water quite the distance from take off. Care must be taken in launching huge air in cross to cross onshore winds as you may very well land on the beach if you don't allow for enough glide time.
Ideally suited to freeriders and seekers of cloud base.
Ozone 54cm Bar (All Instinct Kites)
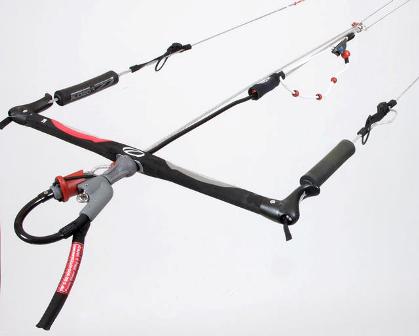
The Trim system is easy to operate, never slips and is in easy reach of even those with the shortest arms. The bar ends have retractable line keeper bungees to keep things tidy and the centre rope of Amsteel is coatd with a PU cover to prevent wear so you never need to replace the centre line.
The Megatron chicken loop is easy to operate, safe and simple to reset. Only draw back is it's uni directional or favours one hand over the other when compared to some other bars. The safety system is above the bar but is transferred through to below the bar via a short bungeed line running through the centre hole to a loop at the head of the chicken loop.
The Megatron C/loop spins to untangle spun front lines but onlyif you connect to the suicide setting below the bar. If you use the flagging safety system you will need to add the Airush Spinning Loop attachment to your harness to keep your safety leash from spinning and tangling.
All in all a very nice, simple, effective and clean bar.
Ozone Repair Kits
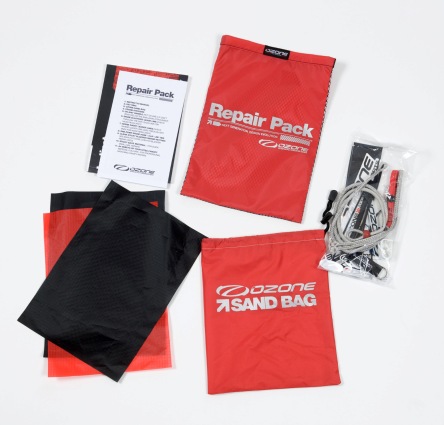
{youtube}_iCoMwlLT_0{/youtube}
Core decided that a 15m just wasn't big enough and so they embarked on a project to deliver a true light wind weapon and started designing the Riot XR LW (Light Wind edition). The LW is specifically made to be truly workable in light winds, it's a remarkable kite and delivers in all aspects .... especially POWER!The Riot XR LW is similar to it's little XR brothers but is noticeably lighter, oh and bigger  . The kite comes with a set of additional 3m extensions for ultimate light wind performance. The extensions can be added to a Core ESP bar or for any 4 line bar for that matter. The XR LW flies on the same bar as the entire Core family which in itself is impressive. When rigging the kite, it looks big, but it's not until you roll it on it's side to launch it, when it dwarfs it's tiny launcher that you notice it really is quite huge. The extra line lengths make the kite look no bigger than a 15.
First day I flew the XR LW it was blowing all of about 5 knots and I fugured it wouldn't even launch, let alone fly. I self launched easily to my surprise and the kite obediently climbed in the light air. With a quick dive of the kite, the power of the kite was staggering, even in 5-6 knots. I grabbed a race board and decided to have a crack at riding in the flat water. It honestly felt quite wierd even attempting to get going. Well, I dived the kite and the power came on, I stepped onto the board and holy cow, off we went. Albeit, I wasn't able to stay upwind and nearly dropped the kite in the water as I turned downwind to gybe and change direction. The gybe would have produced apparent wind of around 3 knots at the kite so I down turned and looped the kite. I made it back to the beach and walked about 70m back up wind.
The wind picked up to 6-7 knots and all of a sudden I was easily holding ground and actually starting to ride upwind. This was insane, never felt anything like it! The turning speed of the kite is pretty quick for a big kite and easily throws you up for big jumps with major hangtime. It's actually pretty fun to throw around.
Add a twin tip at about 10 knots and there's freestyle fun to be had. The kite pulls like a horse, it's just raw bottom end power and it 12 knots you'll be looking for a handful of trim to control the beast. I figure the maximum wind strength is somewhere around 18 knots. The beauty of the LW is it will get you going in wind no one else can go in.
More to follow .....
Core GTS
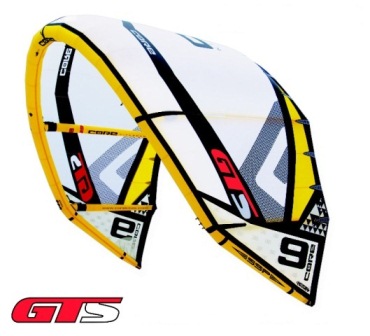
The GTS is a worthy replacement to the GT. It looks amazing with simple graphics and a bit less yellow and dacron in the canopy than the GT. It is physically lighter, and has the same bridle setup as the XR with ultimate tuneability. The bridles are shorter and they have done away with a set of pulleys to give better durability and lower maintenance.
The bar pressure is light and the kite is responsive and quick when setup on light settings and wave steering. Three settings on bar pressure and also three settings on steering responsiveness.
On initial tests (Brief and in poor conditions), The kite displayed amazing stability, and that same power as the GT but in a much more refined and smoother power delivery. Depower feels similar and power similar to the GT. The GTS is a more refined kite which lends itself to much more of a cross over of different riding styles with it's versatility of settings. The kite feels more "C" like than the previous kites but still has the same good properties of the Bridles Delta's. Straighter leading edge on wingtipsassist in easy relaunch and give a more direct feel of the kite in the air.
The new bag is one of the best in the industry, well made, spacious and simple. The bar is the same ESP bar as delivered with GT and XR making it very useable with other models so you can mix and match models without Bar outlay.
I love it! Another outstanding Core Kite! Ask us for a demo ride.
Core Sensor Bar and Lines Review
So finally after a long delay, the brand new Core Sensor Bar and Lines are here in my hot little hands. Yewww! Core devotees have waited very patiently for the arrival of these new bars since word went out over a month ago. Delays were due to a small part sticking in the safety releaseon just one of the test bars and Core felt they were necessary to repair and modify.
Core diligently sent out a worldwide recall on every new Sensor bar and made inhouse mods to these bars to repair a very minor issue. The bars have ben given the all clear and are now circulating around the globe.
The Sensor bar
The bar is extremely light and a nice small diameter ~20mm and covered with soft EVA foam with moulded grip

The Chickenloop and Quickrelease
The quick release is a twist type which is original and simple to use. There is a spring loaded detent position of opened and closed. No chance of accidental release. Not so easy to reset in the water, but still doable in an emergency. The chickenloop itself is very stiff plastic moulded around the looped line which secures to the release mech.

As with the ESP bar setup, the CL is free spinning so when you twist the lines above the bar, it will auto untwist by sheeting the bar in. Sheeting in and out whilst the bar is being cranked through a turn has been addressed with the widened exits under the bar. Bar snapping has been eliminated by the stainless steel bar across the underside of the bar which protects the bar from a strong hit by the CL if accidentally unhooked with a luffed kite. Big improvement!
Safety line is mini 5th as per ESP bar and slides even easier than the ESP. The chicken dick is attached by bungee and can be easily inserted in place or kept out of the way in unhooked mode. Depower line is easy to replace Dyneema.
Bar ends
Are moulded and have line keepers in place for keeping things tidy. As with ESP bar, the steering width can be adjusted by using inside or outside settings. Foam floats keep the bar floating in the water and hands away from danger in case your fingers get caught.

Trim System
The new Sensor Bar has a rope and cleat depower/trim system which is easy to hold with the little toggle on the end. The toggle has velcro wrapped around it so you can stick the toggle to the cleat assembly. Much better system than the old strap adjusters.

Safety leash
The Safety leash is very short, in fact, it's only about 35cm long which is long enough to attach to your harness hook and to the chickenloop only. This keeps it neat and tidy and less to tangle not to mention if you have a drama and continue to get pulled, the safety leash quick release is right in front of you in easy grasp.
NOTE: This standard leash is not possible to use as a handle pass leash. If you require a handle pass leash, it is available as an optional extra. The Pro Leash.

This bar is such an improvement over the ESP bar and will go nicely with the Core XR2 kite. Nice work Core!
CORE RIOT XR
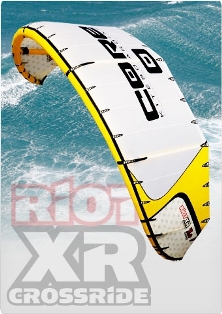
The improvements come from improved aerodynamic profile and stability. Core decided to stay with a centre strut after testing many prototypes and finding the centre strut "just works better".
The power of the kite is a little less than the Core GT by a few knots which brings it in line with most other brands kites in terms of low wind power. The upper end or strong wind power is truly impressive being far higher than most other kites I have ridden. Not just being able to "hold it down" in strong wind, but you can truly throw it around and still have fun with it in strong, really powered conditions. Fantastic!
Relaunch is super easy with the swept back trailing edge similar to the Delta shape. Just turn the bar and the kite relaunches easily and quickly, no hassle. Can't beat Delta style relaunch!
Light wind performance has been taxed a little compared to the GT but has been repaid in the upper end wind range and the quality of all Core kites goes without saying. The finest quality materials are used in the canopy and heavy duty lines (360kg breaking strain) make sure you get the best value for money. The Riot XR uses the same bar as the GT so interchange between models is possible so you don't need a bar for every kite. This translates directly into a cost saving of $500 per kite!
This truly is a kite for everyone.
Core 2010 Riot XR - Rider Review
Finally got some decent wind for a review. Conditions were SSW 20-25 knots with gusts up to 30 knots. Choppy water. Good fun!
To start off with, the bag is same as GT's, just a different colour (Black/white instead of Black/yellow) The bag is ample but not mind blowing, but then again, it's just a bag right, you don't take it out on the town clubbing?. The new bar has some tiny mods but pretty much the same. Chicken finger is longer, safety leash attach ring is new. Thats it for the bag and bar/lines. No need to alter simple, effective and quality.
There are a few refinements on the XR which aren't on the GT. The one pump system is 90 degrees from the struts and leading edge which keeps the transfer tubes tucked away in the corners out of the way (totally unobtrusive) and are a more solid looking piece. There is two little velcro's on the trailing edge end of the centre strut for keeping the bridles from hanging down. This is genius and I can't believe no one else has done this, so simple, so cool! Bridles are a bit longer. (perhaps reason for velcros?).
The build quality is excellent, just like the GT, bomb proof! Solid construction, a very tough kite and beautifully stitched and assembled. The main difference to the GT is, apart from the slightly higher aspect canopy, the tuning knots and adjustments. There are three points on the leading edge which adjust bar pressure and take seconds to change, and three on the wing tips which change steering responsiveness. You can mix and match any setting and the kite flies beautifully although different determined by your choice of settings. The beauty of it is in the ease of mods select the desired bar pressure and select the steering responsiveness. I tried 5 different combinations of settings and it changes the kite from more freestyle to more wav/freeride. Plug and play and anyone could change their kite settings and notice the changes without making the kite unstable or hard to fly. I like lightest bar pressure and fastest turning so I set it up for me 
As soon as you throw the kite up, it feels similar to the GT, but with less bar pressure and more responsive steering. The turning speed feels same as the GT, maybe a tiny bit slower but only just noticeable if at all. So for me, this was an instant hit, a fast kite with lighter bar and more response. Tick!
When riding, the kite is stable and easy but feels like it needs just a little more bar throw to reach full depower when compared to the GT (Keep in mind today was VERY gusty so may be nothing). There seemed to be a little less bottom end, maybe by a few knots against the 10.5 GT but there was a very noticeable top end improvement. At around 2pm, a huge squall came through and I jumped back on the XR in winds of 30 knots and I dialed in about 3 inches of trim and was absolutely comfortable and didn't feel overpowered in the slightest. I would have been panicking amid teabagging on the 10.5 GT. I reckon it would be no problem to fly the 10m XR comfortably in 30-35 knots and yet it only seemed to give away a little in bottom end. Pretty impressive!
Boosting was as easy as the GT but less aggressive on takeoff. I got some very high jumps on a 10m which rarely happens, now I can't wait to ride the smaller ones in real wind! The jumps have smooth glide, great hangtime and are pretty easy to land. I really liked the ride and thought it was a great kite, the more you ride it, the more differences you notice to the GT. It is VERY similar, but more refined so you don't need to be as strong to throw it around. I'd recommend this kite to anyone looking for a fun responsive enjoyable kite, it just is more polished. GT is still the agro kite for guys wanting grunt and aggressive power and turning. The XR coud be a nice ride for the ladies as well as the gents. Excellent, well worth the wait, and for the price, good stuff!
The GT still has it's place as the mad mans kite, but the XR will certainly be more widely received as a great all rounder. Maybe a surf test required now. Hmmmmm .... 24/09/09
]]>